Document numbers
If you use QuickBooks Complete to create invoices or estimates from monday, configure QuickBooks to generate document numbers automatically. This keeps numbering in sequence and avoids manual entry errors. This page walks through the exact QuickBooks settings needed.
How to configure QuickBooks for auto-populating invoice and estimate numbers
By default, QuickBooks allows custom transaction numbers. Many businesses prefer invoice and estimate numbers to be automatically generated in sequence. Use these steps to configure that behavior.
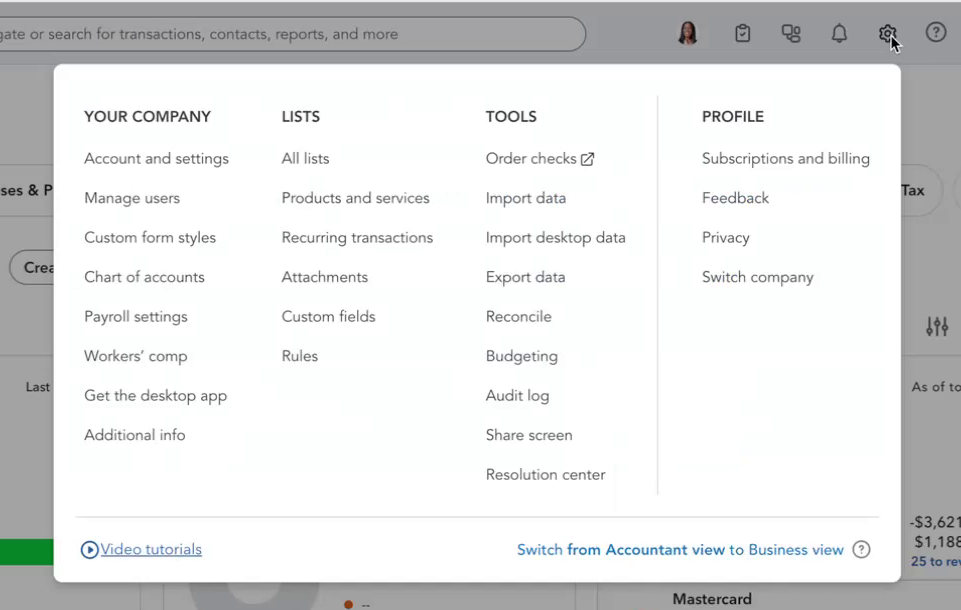
Step 1: Access account and settings
- Click the gear icon in the top-right corner of your QuickBooks dashboard.
- From the dropdown, select Account and settings under Your Company.
Step 2: Navigate to Sales settings
- In the Account and settings window, click the Sales tab in the left menu.
- This opens settings for sales forms and invoice behavior.
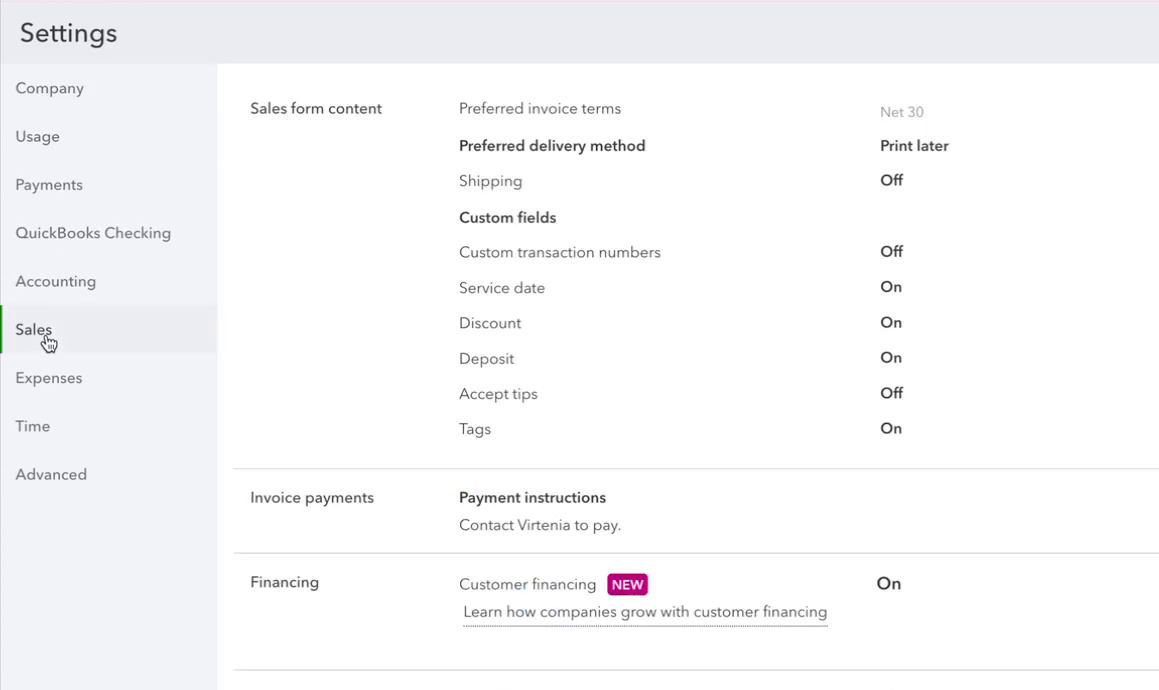
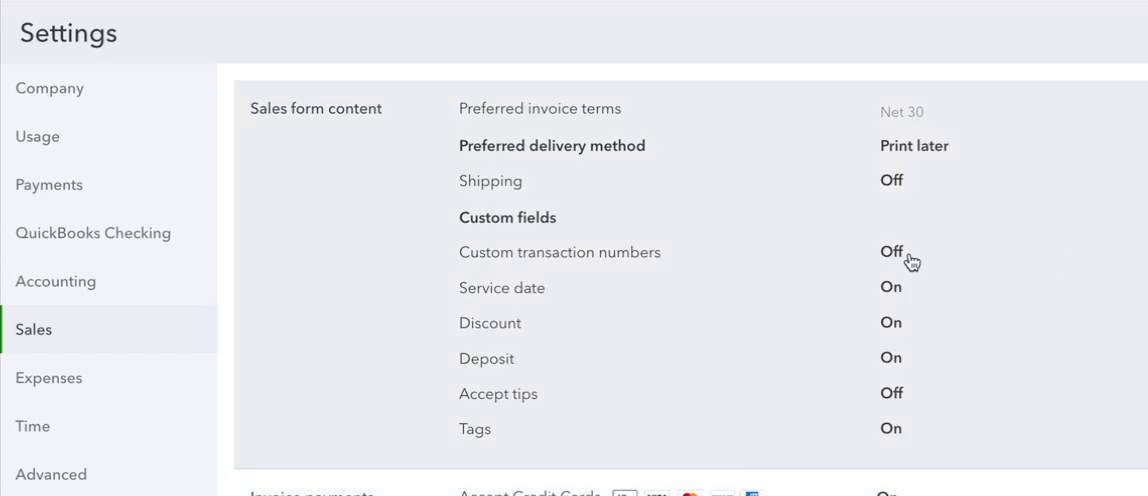
Step 3: Disable custom transaction numbers
- In Sales form content, find Custom transaction numbers.
- If it is set to
On, click Edit (pencil icon) on the right. - Toggle the setting to
Off. - Click Save.
Pro tip: Setting this to Off tells QuickBooks to take control of numbering.
If it stays On, QuickBooks assumes you want to manually type a specific number for
each document.
Step 4: Create a new invoice
- Create a new invoice or estimate.
- Leave the Invoice # or Estimate # field blank.
- Save the invoice.
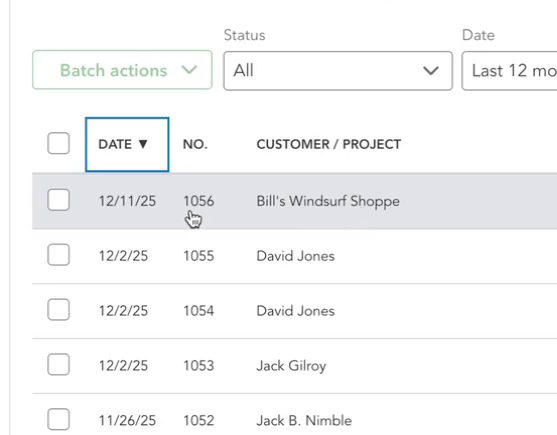
Step 5: Verify the auto-population
- Open your invoices list after saving.
- Confirm QuickBooks assigned the next sequential number, such as
1056after1055.
When document numbers are generated automatically in QuickBooks, they automatically populate back to monday via the app.
Demo video